NAS Private Deployment

NAS (Network Attached Storage) is a small server dedicated to file management — it mounts disks on the local network and provides file access, backups, sharing, versioned snapshots, media services, etc. It is not intended for running general compute tasks.

Common NAS vendors:

  • Synology
  • Lenovo Personal Cloud / ZhiKong / Ugreen
  • Western Digital My Cloud
  • ...

No domain required — private deployment

Local NAS deployment video

The video demonstrates obtaining the deployment script from VoceChat embedded VoceSpace and deploying with it.

If you only want to deploy VoceSpace, download the deployment script and follow the "Manual script deployment" section below.

Download the deployment script

Click to download the shell script below:

NAS.sh

Script summary:

  • Pulls all required Docker images
  • Automatically creates containers
  • Does not configure proxy

Manual script deployment

You don't need to modify anything — run the script directly:

1# SSH into your server
2ssh your.account@your.nas.ip
3
4# Switch to root if needed
5sudo -i
6
7# Paste the script into deploy.sh and save (:wq)
8vim ./deploy.sh
9
10# Make executable (note: using 644 per original instructions)
11chmod 644 ./deploy.sh
12
13# Run the script
14sh ./deploy.sh

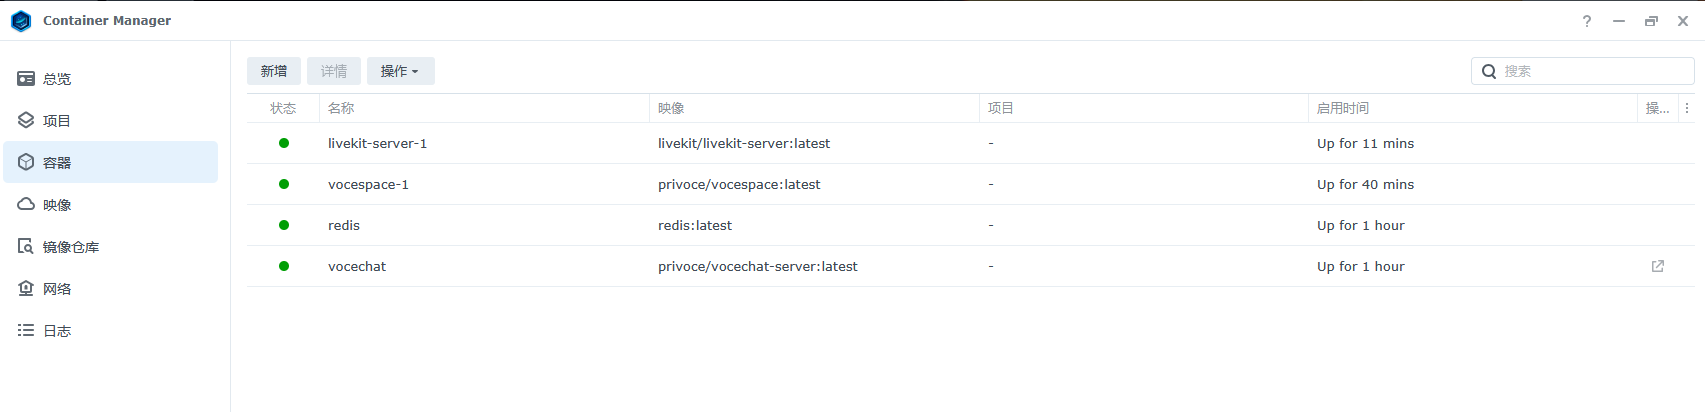
After completion you should see these containers running:

  • redis
  • vocespace
  • livekit-server

nas_container

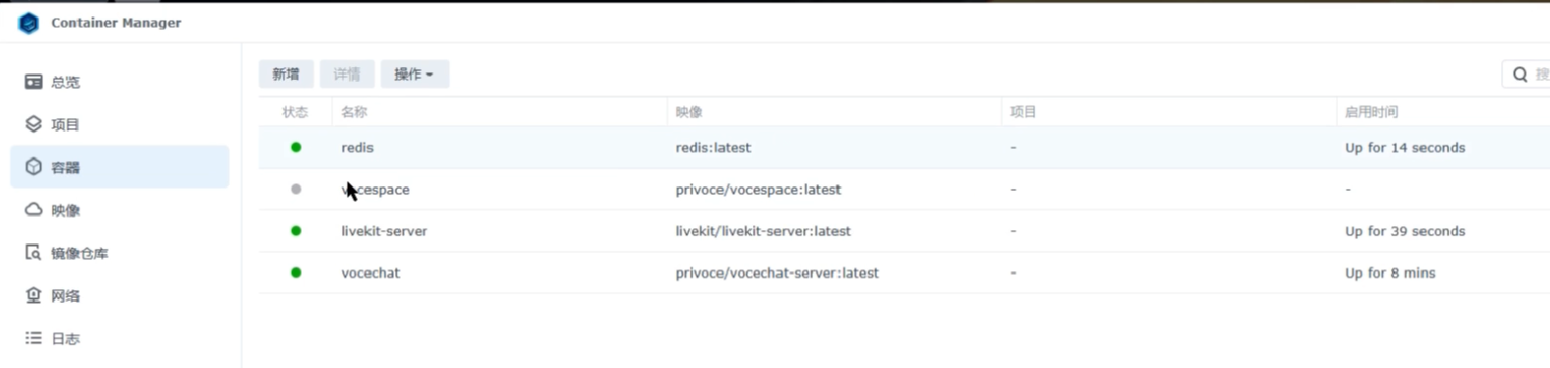
Note: the vocespace container may fail to start because vocespace.conf.json lacks read/write permissions.

Add read/write permission for vocespace.conf.json

vocespace.conf.json is located where you ran the script. If you check the container logs you'll likely see: /app/vocespace.conf.json: Permission denied

1chmod 644 ./vocespace.conf.json

After granting permission, restart the vocespace container.

LAN access

At this point your local installation should be complete and containers running, but the service still uses http and ws, which won't work for secure communications. Let's continue.

alt text

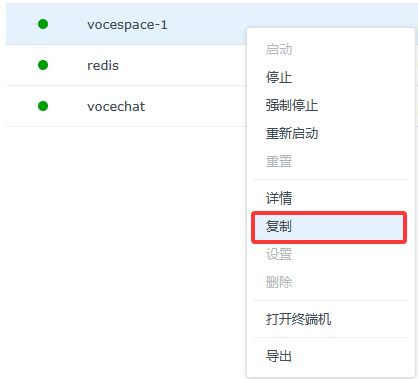
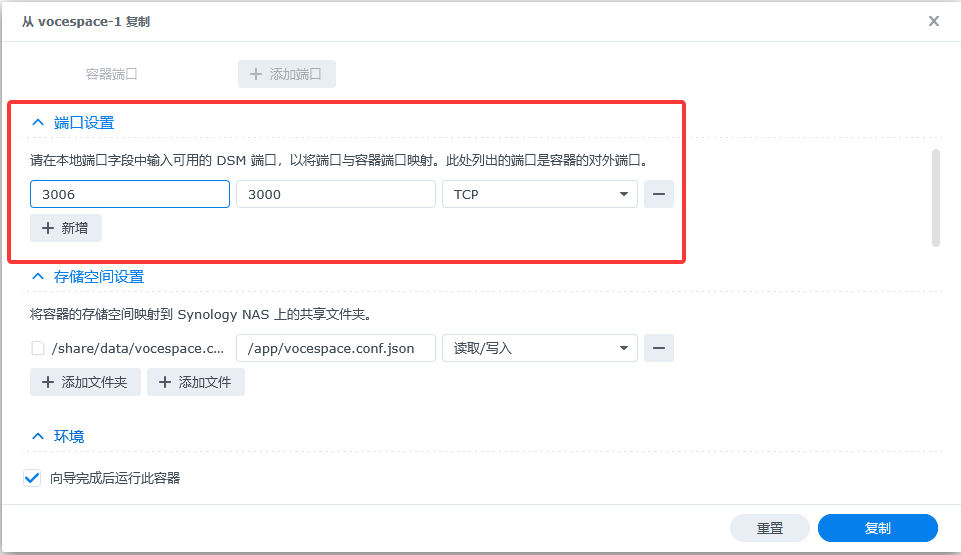
Duplicate the VoceSpace container

Right-click the vocespace container and choose "Duplicate" to create a new instance. Change the original port mapping of 3008 to 3006 (or any other unused port except 3008).

alt text

alt text

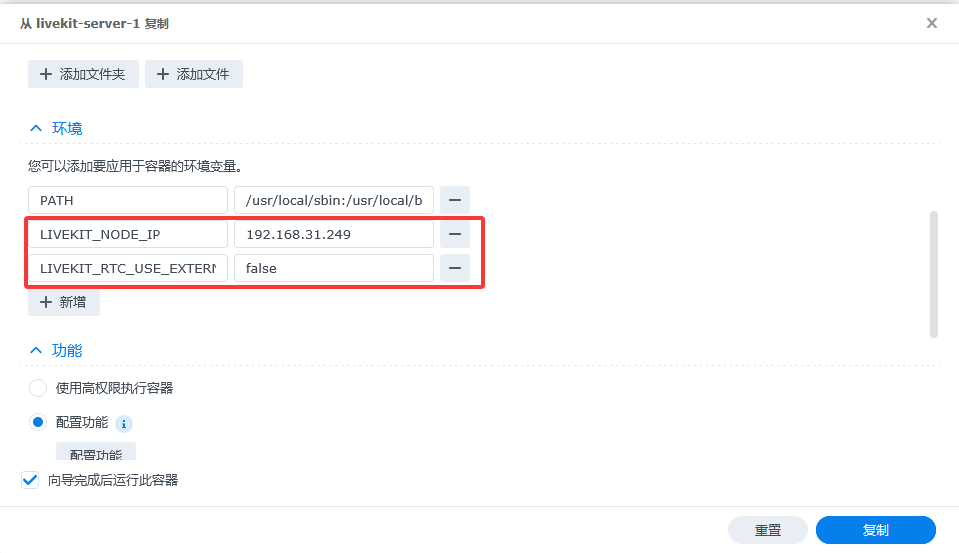
Duplicate the livekit-server container

Also duplicate livekit-server. Add the following two environment variables so WebRTC won't route through the public internet. Make sure to use your NAS IP exactly.

  • LIVEKIT_NODE_IP = your.nas.server.ip
  • LIVEKIT_RTC_USE_EXTERNAL_IP = false

alt text

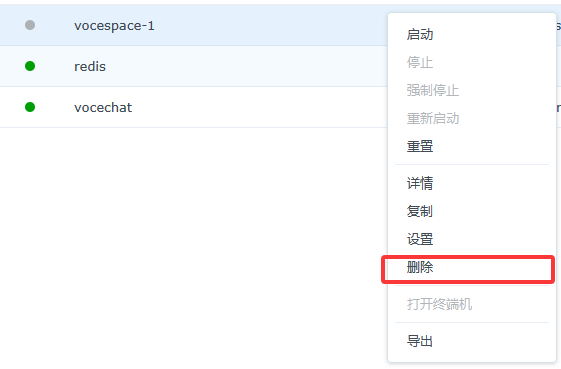
Remove the previous containers

After duplication you can remove the original VoceSpace and livekit-server containers.

alt text

Configure Nginx reverse proxy

Find VoceSpace IP inside Docker

Run the command below to list all containers' IPs and find the VoceSpace container IP — remember it.
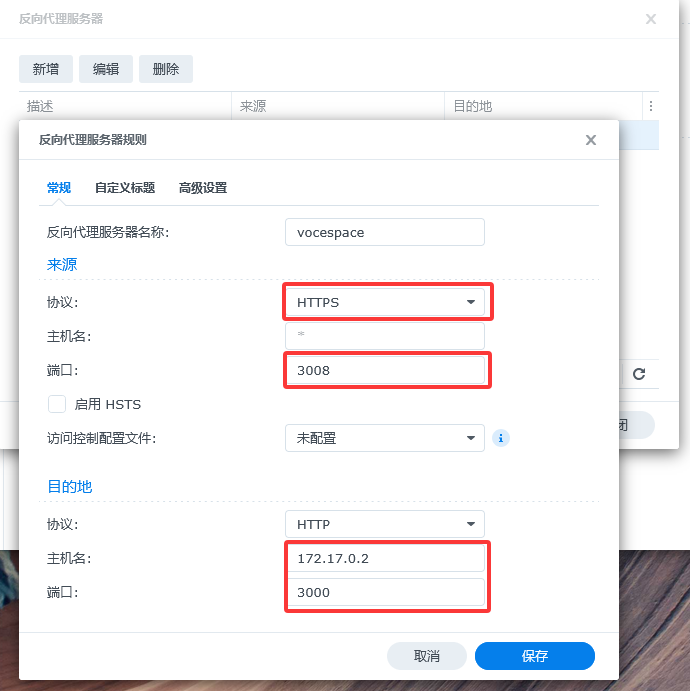
1# Become root
2sudo -i
3
4# Query container IPs
5docker ps -q | xargs -n 1 docker inspect -f '{{.Name}}: {{range.NetworkSettings.Networks}}{{.IPAddress}}{{end}}'

alt text

Configure the proxy

Open Control Panel → Login Portal → Advanced → Reverse Proxy.

Add a new rule and save.

  • Source
    • Protocol: HTTPS
    • Hostname: (leave blank)
    • Port: 3008
  • Destination
    • Protocol: HTTP
    • Hostname: (this is the VoceSpace Docker IP)
    • Port: 3000

alt text

Add RTC configuration

Now modify the Nginx config to upgrade ws to wss for RTC.

# Change to nginx sites-enabled cd /usr/local/etc/nginx/sites-enabled # Edit the proxy server config vim server.ReverseProxy.conf

The file should look like this when opened:

1server {
2    listen 3008 ssl default_server;
3    listen [::]:3008 ssl default_server;
4
5    server_name _;
6
7    include /usr/syno/etc/www/certificate/ReverseProxy_e7f64ca5-8ca2-4f67-bf01-16e3c2cb0bd4/cert.conf*;
8
9    include /usr/syno/etc/security-profile/tls-profile/config/ReverseProxy_e7f64ca5-8ca2-4f67-bf01-16e3c2cb0bd4.conf*;
10
11    proxy_ssl_protocols TLSv1 TLSv1.1 TLSv1.2 TLSv1.3;
12
13    location / {
14
15        proxy_connect_timeout 60;
16
17        proxy_read_timeout 60;
18
19        proxy_send_timeout 60;
20
21        proxy_intercept_errors off;
22
23        proxy_http_version 1.1;
24
25        proxy_set_header        Upgrade            $http_upgrade;
26
27        proxy_set_header        Connection            $connection_upgrade;
28
29        proxy_set_header        Host            $http_host;
30
31        proxy_set_header        X-Real-IP            $remote_addr;
32
33        proxy_set_header        X-Forwarded-For            $proxy_add_x_forwarded_for;
34
35        proxy_set_header        X-Forwarded-Proto            $scheme;
36
37        proxy_pass http://172.17.0.2:3000;
38
39    }
40
41    error_page 403 404 500 502 503 504 /dsm_error_page;
42
43    location /dsm_error_page {
44        internal;
45        root /usr/syno/share/nginx;
46        rewrite (.*) /error.html break;
47        allow all;
48    }
49
50}

Insert the following block just above location / { to handle RTC upgrade:

1location /rtc {
2
3    proxy_pass http://127.0.0.1:7880;
4
5    proxy_http_version 1.1;
6
7    proxy_set_header Upgrade $http_upgrade;
8
9    proxy_set_header Connection "Upgrade";
10
11    proxy_set_header Host $host;
12
13}

After editing, save and exit (ESC then :wq).

The full config becomes:

1server {
2    listen 3008 ssl default_server;
3    listen [::]:3008 ssl default_server;
4
5    server_name _;
6
7    include /usr/syno/etc/www/certificate/ReverseProxy_e7f64ca5-8ca2-4f67-bf01-16e3c2cb0bd4/cert.conf*;
8
9    include /usr/syno/etc/security-profile/tls-profile/config/ReverseProxy_e7f64ca5-8ca2-4f67-bf01-16e3c2cb0bd4.conf*;
10
11    proxy_ssl_protocols TLSv1 TLSv1.1 TLSv1.2 TLSv1.3;
12
13    location /rtc {
14
15        proxy_pass http://127.0.0.1:7880;
16
17        proxy_http_version 1.1;
18
19        proxy_set_header Upgrade $http_upgrade;
20
21        proxy_set_header Connection "Upgrade";
22
23        proxy_set_header Host $host;
24
25    }
26
27        location / {
28
29        proxy_connect_timeout 60;
30
31        proxy_read_timeout 60;
32
33        proxy_send_timeout 60;
34
35        proxy_intercept_errors off;
36
37        proxy_http_version 1.1;
38
39        proxy_set_header        Upgrade            $http_upgrade;
40
41        proxy_set_header        Connection            $connection_upgrade;
42
43        proxy_set_header        Host            $http_host;
44
45        proxy_set_header        X-Real-IP            $remote_addr;
46
47        proxy_set_header        X-Forwarded-For            $proxy_add_x_forwarded_for;
48
49        proxy_set_header        X-Forwarded-Proto            $scheme;
50
51        proxy_pass http://172.17.0.2:3000;
52
53    }
54
55    error_page 403 404 500 502 503 504 /dsm_error_page;
56
57    location /dsm_error_page {
58        internal;
59        root /usr/syno/share/nginx;
60        rewrite (.*) /error.html break;
61        allow all;
62    }
63
64}

Reload nginx

1systemctl reload nginx

Ensure VoceSpace config and restart container

Edit the VoceSpace configuration file and restart the VoceSpace container:

1vim /volume1/share/data/vocespace.conf.json

Pay attention to these settings in the config:

  1. In livekit, set the URL to: wss://your.server.ip:3008 — note the port is 3008, not 7880.
  2. In redis, set host to your server IP.

Example:

1{
2    "livekit": {
3        "key": "APIQLeUrXGujRQk",
4        "secret": "fWHUA2CQlfi1iG4L3YqWKIhXuF9aqvlO5uTWAuHoLKm",
5        "url": "wss://192.168.31.249:3008"
6    },
7    "codec": "vp9",
8    "resolution": "1080p",
9    "maxBitrate": 3000000,
10    "maxFramerate": 30,
11    "priority": "medium",
12    "redis": {
13        "enabled": true,
14        "host": "192.168.31.249",
15        "port": 6379,
16        "password": "vocespace",
17        "db": 0
18    },
19    "server_url": "192.168.31.249",
20    "host_token": "vocespace",
21    "license": "eyJ0eXAiOiJKV1QiLCJhbGciOiJIUzI1NiJ9.eyJlbWFpbCI6ImhhbkBwcml2b2NlLmNvbSIsImV4cGlyZXNfYXQiOjE3NzkyNzg0MDAsImNyZWF0ZWRfYXQiOjE3NDc3NDI0MDAsImRvbWFpbnMiOiIqIiwibGltaXQiOiJwcm8iLCJpZCI6IjZkZjgyMTMyLTIyODQtNGY2MS1iYmZhLWZkZmU4YmMzMWE2NyJ9.PiagYRDWSpzhIdbnY-pp8QeOf5Ij7neV8RMEafDgVT4"
22}

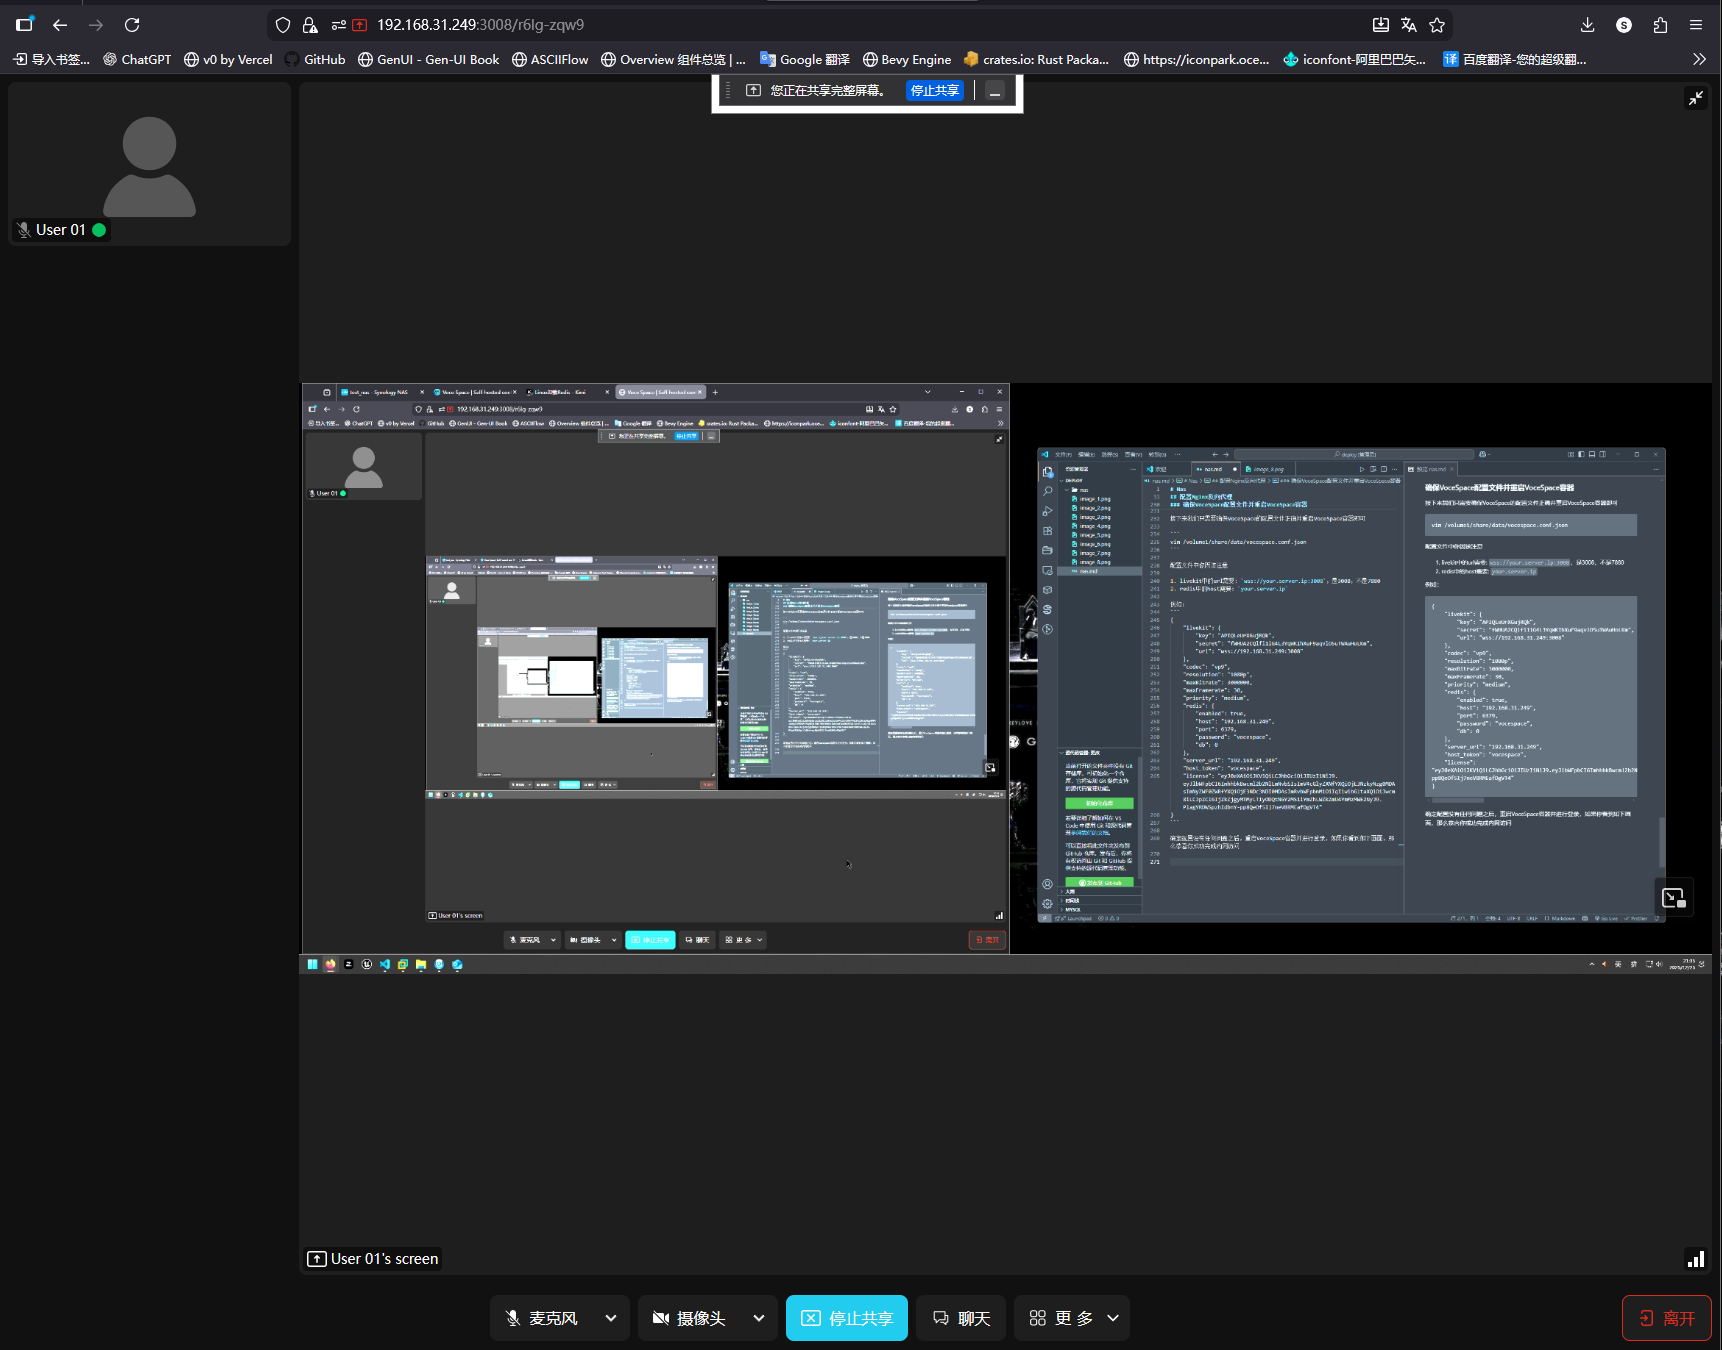
After confirming the config, restart the VoceSpace container and log in. If you see the screen below, LAN access is successfully configured.

alt text

Errors

Restricted RTC Access

Restricted RTC access generally stems from two reasons:

  1. Incorrect Vocesspace configuration

  2. Inadequate server configuration preventing the service from starting correctly.

To address these issues, consider upgrading the server configuration (minimum 2 cores and 2GB RAM). For configuration problems, check the vocesspace.conf.json file to determine if the livekit.url configuration is incorrect.

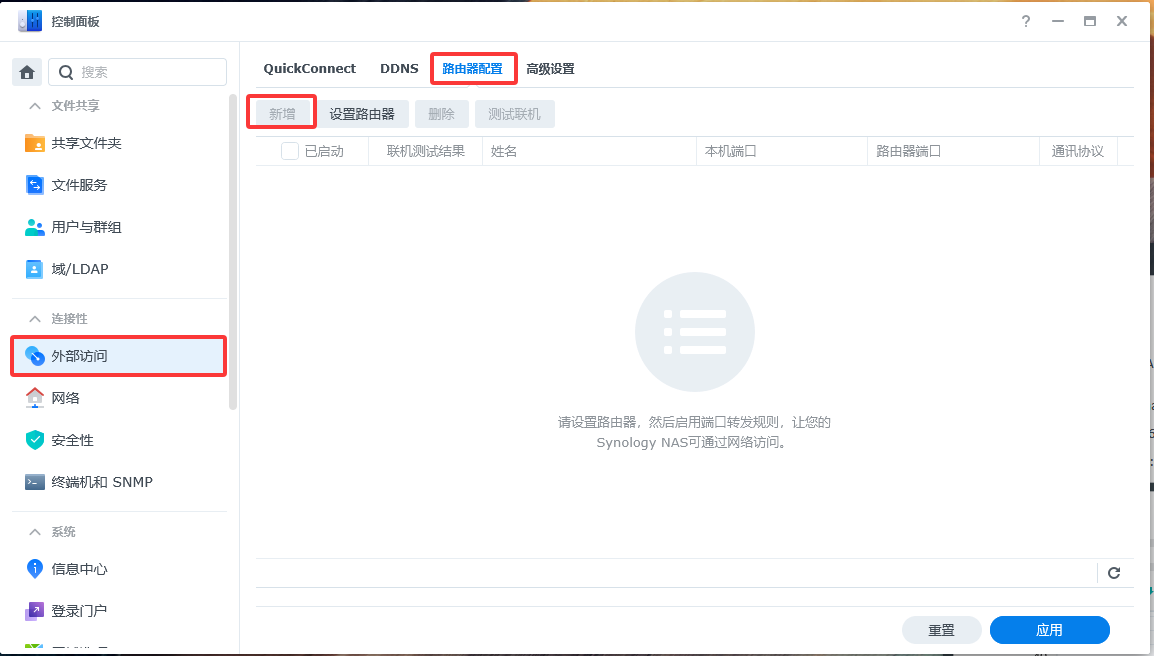
External Port Access

Configuring a router on the NAS may prevent external access. In this case, you need to add port rules.

route

port type ingress/egress allow ip
3008 tcp ingress 0.0.0.0/0 Ipv4
3008 tcp egress 0.0.0.0/0 Ipv4
7880 tcp ingress 0.0.0.0/0 Ipv4
7881 tcp ingress 0.0.0.0/0 Ipv4
6379 tcp ingress 0.0.0.0/0 Ipv4
80 tcp ingress 0.0.0.0/0 Ipv4
443 tcp ingress 0.0.0.0/0 Ipv4
50000~60000 udp ingress 0.0.0.0/0 Ipv4